VJing with Web MIDI and RxJS
Since the announcement of Web MIDI API in Chrome 43, web developers have been able to send and receive MIDI messages, allowing bi-directional communication between browser and external music devices, such as keyboards, samplers or drum machines.

Refer Web MIDI API in Chrome 43
The MIDI standard, which Web MIDI also implements, is from 1983 and supported by basically all instruments with external connectivity. MIDI input data can be used, for example, for controlling browser-based software instruments that are made possible by another rather new technology, Web Audio API. MIDI output data can be used to control external synthesizers using, for example, browser-based music sequencers.
In addition to the rather obvious use cases already mentioned, the variety of cheap MIDI controllers allows them to be used as general purpose input devices. A simple mixing board lets you send slider and knob data that can be used to control any application. Real-time visualizations that run in browsers via WebGL are a good example. We experimented with real-time visualization control for last year’s annual Futubileet party and the concept seemed to work pretty well.
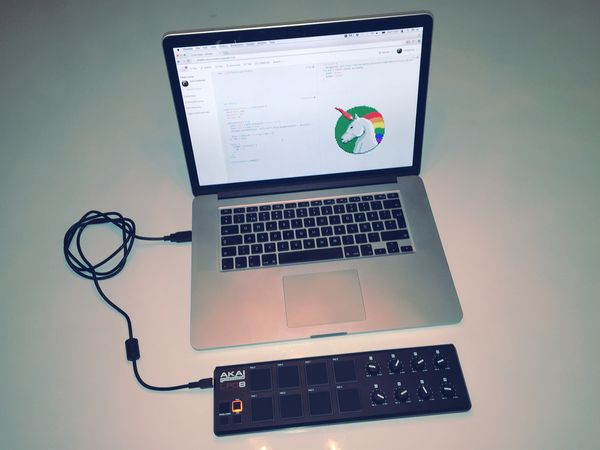 An USB MIDI controller with pads and knobs
The MIDI message callback
In order to receive MIDI messages from the browser, a MIDIAccess object must be first requested with the navigator.requestMIDIAccess() function. The function returns a Promise, which can then be used for selecting input device and registering an event handler for the input.
    navigator.requestMIDIAccess().then(midiAccess => {
      // Get first available midi input device
      const firstInput = midiAccess.inputs.values().next().value;

      // Set a handler that outputs the incoming message
      firstInput.onmidimessage = function(event) {
        console.log(parseEvent(event));
      };
    });
MIDI input message information is contained in event.data object passed by the callback. In the previous example we used also parseEvent function that returns event status and payload, and makes the code examples bit cleaner.
    function parseEvent(event) {
      return {
        status: event.data[0] & 0xf0,
        data: [
          event.data[1],
          event.data[2]
        ]
      };
    }
In the returned object, status defines the MIDI message type that can be, for example, key down and up (user presses and releases a key or pad) and control (user turns a knob or moves a slider). The data payload size is two bytes and dependent of the status. Payload can be the number of the note (key) pressed, velocity of the pad tapped, current value of the knob turned and so on.
A detailed description of the MIDI message format can be found here.
From callbacks to RxJS streams
Reactive streams are known to adapt nicely to callback-based APIs. For general purpose controlling, we are combining data from various sources, such as sliders, knobs, pads and keys, processing it and directing it to multiple targets. For this kind of processing, the stream abstraction seems like a really good match.
To switch from callbacks to RxJS streams, we need to create an Observable that pushes events when MIDI input data arrives to the API. I wrote a simple RxJS Web MIDI bindings library for the task and it's used in the following examples. The previous callback-based message output example can be implemented with RxJS and the bindings library as follows:
    // Convert the promise to Observable, select the first input device and get stream of messages
    const inputStream = Rx.Observable.fromPromise(navigator.requestMIDIAccess())
      .map(midi => midi.inputs.values().next().value)
      .flatMap(input => midimessageAsObservable(input))
      .map(message => parseEvent(message));

    inputStream.subscribe(message => console.log(message));
In the example we first convert the promise to an Observable with standard RxJS function fromPromise. We then map the stream so that it contains only the first MIDIInput object. In order to get the stream of all MIDI messages arriving to the input we use midimessageAsObservable from RxJS Web MIDI bindings library. As we are in a situation where we have a stream inside a stream, we have to use flatMap to get a stream of messages. After this we just parse the arriving messages and output them.
Example: Controlling the speed of an effect
The previous example already looks nice, but RxJS streams provide even more benefits when mapping data from different inputs to a single or multiple targets. As an example, let's see how to control the speed of a repeating visual effect such as this pulsating Chilicorn. We want to be able to set the speed in two ways: by tapping a pad twice and taking the time between the taps (often referred to as "tap tempo") or by adjusting it directly by turning a knob. Internally, we use beats per minute (BPM) as the measure for the speed.
We start the implementation by creating two new streams that contain pad and knob input messages. inputStream variable is assumed to be set-up the same way as in the previous example. A stream of pad tap messages can be easily received by just filtering key events of a defined note from all of the incoming messages. Knob values can be received by filtering only incoming control values of a defined control number.
The tap tempo functionality can be created with taking interval between two consecutive pad tap events by using timeInterval function. A separate helper function msToBpm has been defined for calculating number of beats per minute (BPM) value from the time interval between taps. We also want to restrict the BPM to a minimum value for omitting situations where user has tapped only once and taps again after a long period of time.
For setting the speed with knob, we take the knob value and use a suitable multiplier which maps the MIDI control value (0-127) to BPM range of 0 to 199. Finally we combine the two streams and subscribe the resulting stream. When messages arrive, we set the BPM for our visualization code.
    const noteOnEvent = 144;
    const firstPadNote = 36;
    const controlEvent = 176;
    const firstKnobIndex = 1;

    const padStream = inputStream
      .filter(x => x.status === noteOnEvent)
      .filter(x => x.data[0] === firstPadNote);

    const controlStream = inputStream
      .filter(x => x.status === controlEvent)
      .filter(x => x.data[0] === firstKnobIndex);

    const tapTempoStream = padStream
      .timeInterval()
      .skip(1)
      .map(x => msToBpm(x.interval))
      .filter(x => x > 40);

    const knobTempoStream = controlStream
      .map(x => x.data[1])
      .map(x => Math.round(x / 127 * 200));

    const tempoStream = tapTempoStream.merge(knobTempoStream);

    tempoStream.subscribe(bpm => {
      chilicornEffect.setBpm(bpm);
    });

    // Convert millisecond time to beats per minute
    function msToBpm(ms) {
      return Math.round(60000 / ms);
    }
Conclusion
Even though the previous example was fairly simple, we can already see many benefits from using this approach:
- The code is self-documenting and easy to read, even without comments
- Specific data from input can be get cleanly by using filtering
- Functionalities like tap tempo are easy to build with RxJS combinators
- Event input, processing and the utilizing code are nicely separated
The setup works well especially for sketching and for visualizations that don't require really heavy rendering or computation, as JavaScript and WebGL performance may not match native code using for example OpenGL. On the other hand, the setup allows rapid development with direct support for multiple platforms.
We used real-time visualization as an example of a controllable application, but these concepts should work well for any kind of application that may use data from external MIDI controllers.
 Arto ChydeniusSenior Software Engineer

